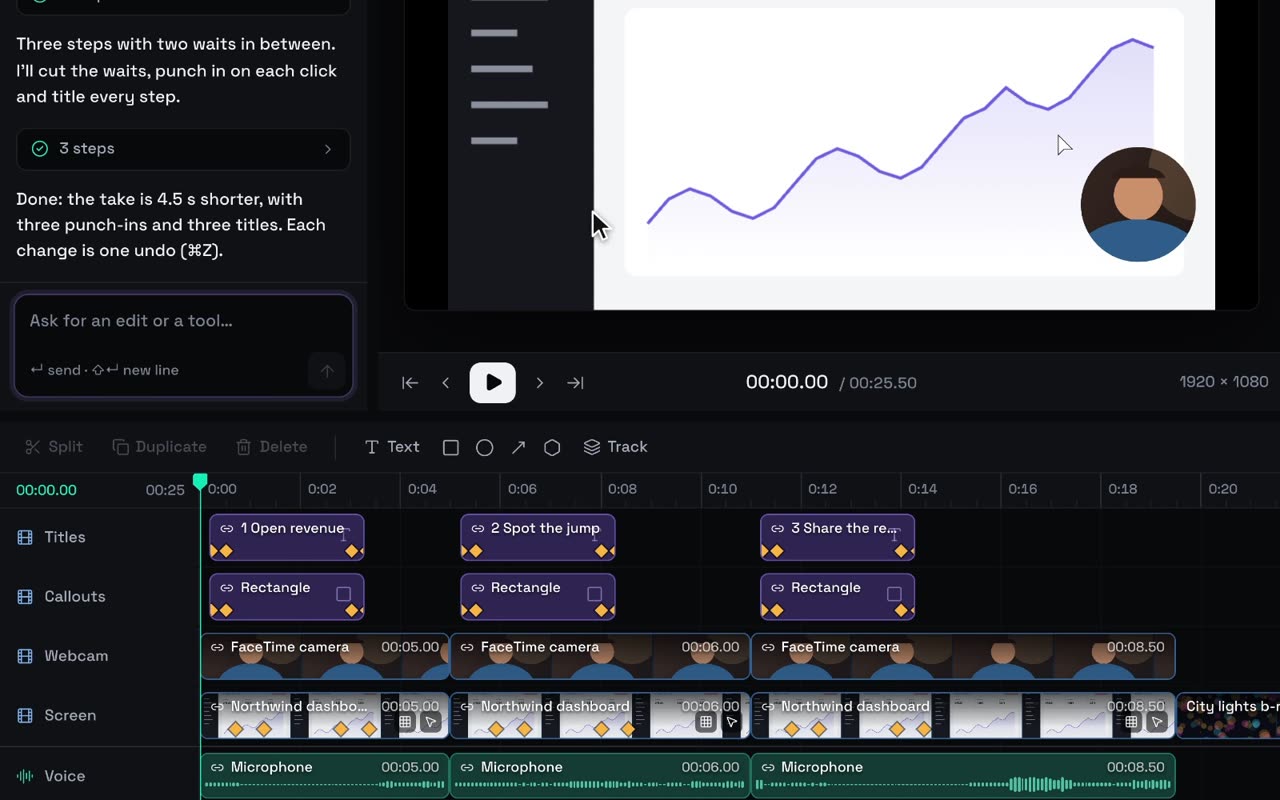
A good demo is mostly decided before you press record. This guide covers everything Studio can capture, how a take arrives on your timeline, and the habits that turn a take into a video in minutes, whether you do the cut or your agent does.
What Studio records
Open Record (from Start your edit or the Media tab) to get the Record demo panel. Here’s what each source gives you.
| Source | Where you set it | What you get |
|---|---|---|
| A window | Screen or window ▸ Windows | Only this window is recorded, nothing around it |
| A whole display | Screen or window ▸ Displays | The full screen. Studio itself stays out unless you include it |
| Webcam | Camera | A bubble on its own layer: Circle, Oval, Rounded, Square or Wide, in three sizes and four corners |
| Microphone | Microphone | Your voice on its own audio layer. No microphone · narrate later skips it |
| System audio | System audio | App sounds on their own audio layer |
A few things worth knowing:
- System audio follows the source. Record a window and you get that app’s sound only, so no chat pings from other apps. Record a display and you get everything your Mac plays.
- There’s no region picker. To show part of the screen, record the window and crop it afterwards in the Inspector’s Crop section.
- The webcam stays editable. Change the bubble later in the Inspector’s Overlay style section without rerecording.
- Windows only appear while they’re on screen. If yours is missing, bring it forward and click Refresh sources and devices.
Your iPhone app
Run it in the iOS Simulator and record the Simulator window like any other window. That’s all there is to it.
Check before you commit
Under Check before recording, Preview screen & camera shows exactly what you’ll capture. Test microphone · 5 seconds records a short test you can play back with Listen to test. The test never becomes part of your project.
Studio remembers your microphone, camera and bubble style between launches. It doesn’t remember System audio or the making-of switches below, so you choose those again after a relaunch.
How a take lands
Click Record after 3-second countdown, do your thing, then Stop & edit on the floating bar. The bar is never filmed.
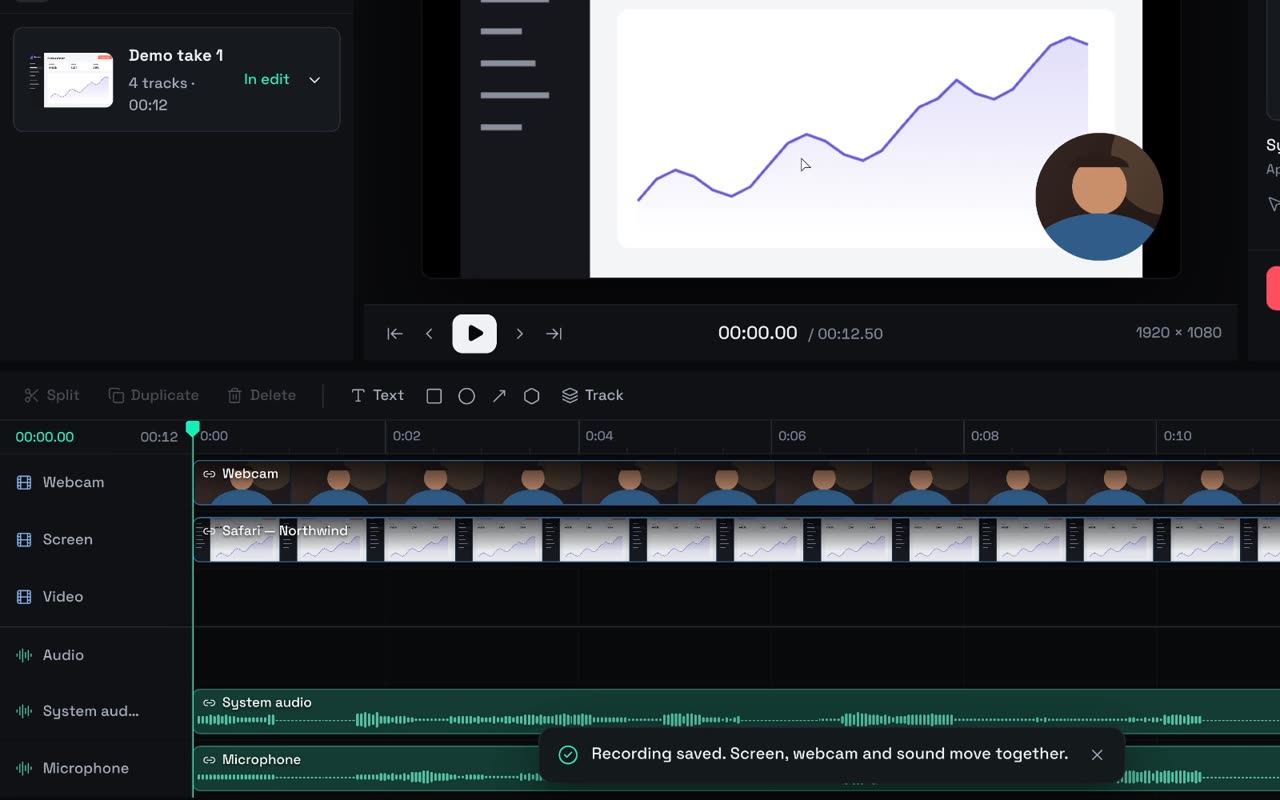
Your take arrives at the end of the timeline as separate assets on one shared clock: a Screen track, plus Webcam, Microphone and System audio tracks for whatever you turned on. Studio links them into one edit group, and the toast says so: Recording saved. Screen, webcam and sound move together.
- Linked layers move and trim together. Drag, trim, split (⌘B) or delete the take and every layer stays in sync.
- Work on one layer by holding ⌥ while you click or drag, or right-click and choose Select only this layer. Handy for trimming the webcam out of the intro, or turning down just the mic.
- The cursor stays editable. If the panel says Cursor movement and clicks stay editable after you stop, the Inspector’s Cursor section can enlarge it (Subtle, Presenter, Giant), add a Ring on clicks or Hide when idle. A few sources bake the cursor into the picture instead, and the panel tells you before you record.
- Takes stay findable. In Media, the All view groups each take’s tracks into one card, and In edit marks the takes you’re using.
Include Studio, for a making-of
Want to show your agent at work? When you record a display, open Making-of:
- Include Studio puts your workspace and agent in the shot. Studio’s live preview hides during capture to avoid feedback, and the floating controls stay out of the picture.
- Include Studio audio appears only when Include Studio and System audio are both on. It’s a separate choice on purpose: showing Studio never records Studio’s sound unless you ask.
For window takes, Studio is always left out.
Habits that make a take edit well
Clean the stage
Close what you won’t show: extra tabs, bookmarks bars, other apps. Use sample data, never a real customer’s. Studio leaves macOS notification banners out of display recordings, but turning on a Focus mode still saves you from a distracting ping mid-take.
Script the run
Write down the three to five steps you’ll show, and where you’ll click. Rehearse once. One idea per take beats a tour of everything.
Pause on the moments that matter
After each important click, hold still for a beat while the screen answers. That beat is where a zoom or a title goes, and where your agent will look when you ask it to “zoom into the clicks.”
Keep takes short
Record one section at a time. Each new take lands after the last, so a demo builds up in order. After a take, Record another section starts the next. Fumbled it? Keep & restart keeps the take in Media (it isn’t added to the edit) and counts down again with the same setup.
Pause for the boring bits
Builds, spinners, uploads: press Pause, wait, then Resume. Paused stretches are removed from every layer, cursor included.
Record longer than you need
Start a few seconds early and stop a few seconds late. Trimming is free and instant. Since Studio 2.1.2 the timeline holds three hours, so even a long walkthrough fits whole.
Shape the window for the format
Studio fits your recording inside the canvas, so a wide window on a Portrait · 9:16 project sits small in the middle. For vertical videos, make the window tall and narrow before you record. For landscape, make it wide.
Hide secrets afterwards
Spot an email address or an API key? Select the clip, open Blur in the Inspector and choose Draw a blur region. The blur stays with that clip.
Narrate last
Record your demo with No microphone · narrate later, trim it, then open Record ▸ Add commentary. Pick a Section to narrate (Whole edit, Selected clip or Choose start and end), keep optional Notes to read beside you, and record over the playing edit. Then choose Keep take, Retake this section or Keep in Media only.
Rather not use your own voice? Generate ▸ Voice reads your script in an ElevenLabs voice, 0.15 a line (how voiceover works).
Hand the take to your agent
A take recorded this way is easy for an agent to cut. With your coding agent connected, press ⌘K and try:
Look at my newest take. Trim everything before my first click, cut any stretch where nothing moves, and zoom in on each click for a second or two.
Claude Code, Codex or OpenCode working from your terminal can even hold the camera: record a window while it drives your app, then cut the dead time and zoom toward the action. You still grant Screen Recording yourself, once.
What it cost
Nothing. Recording is local and free, and so is every retake.
Next
- Polish a recording with your agent: prompts for cutting, zooming, cropping and titling.
- Export and share your video: formats, the badge, and where to post.